IPFire On Raspberry Pi
The goal of this project is to get an open source firewall distribution to boot in a raspberry pi so I can get a inline firewall for my network. I want to get an idea of who is trying to break in from the outside, increase my security from external attackers (because right now my external asset is a Linksys router). IPFire was the first pick based on my research, and it was relatively simple to install and configure.
Hardware
- Raspberry Pi 4
- Micro SD card
- USB-To-Ethernet cable
- Keyboard
- Monitor
Software
- IPFire image
Outcomes
- No cost open source firewall
- Suricata IDS sensor
- Content filter using Web Proxy
- Location blocking
- Firewall rules
- IP block list based on known malicious IPs
- Logging and connection visibility
- Control over your infrastructure
Install Steps
- The first step is going to be to download aarch64 ISO image from IPfire
- Extract the file so you are left with just the image (Get rid of the XZ extension)
- Use Pi imager and select the IPfire image you downloaded from your file system
- Once verified and downloaded, place the MicroSD card in the raspberry pi, connect your monitor and mouse, and power up the Pi
The Pi should directly boot into the IPFire appliance and go into the boot settings
IPFire configuration
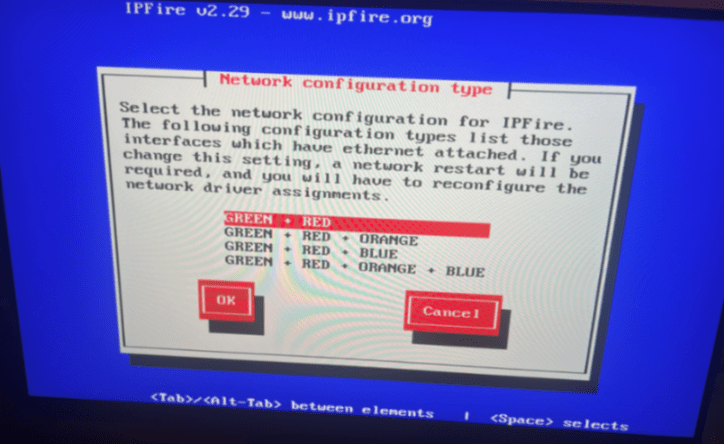
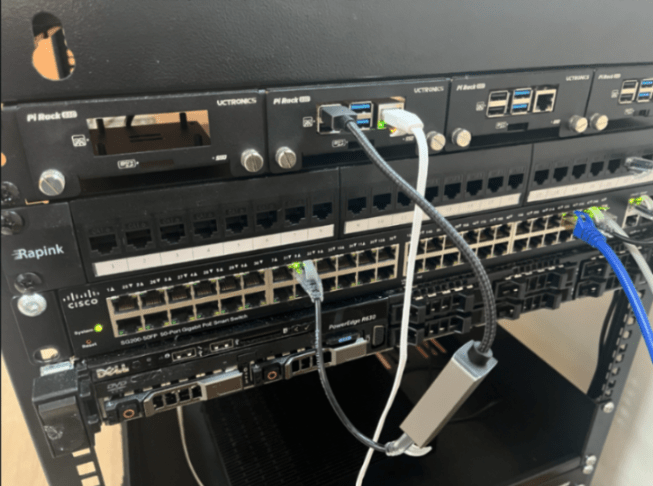
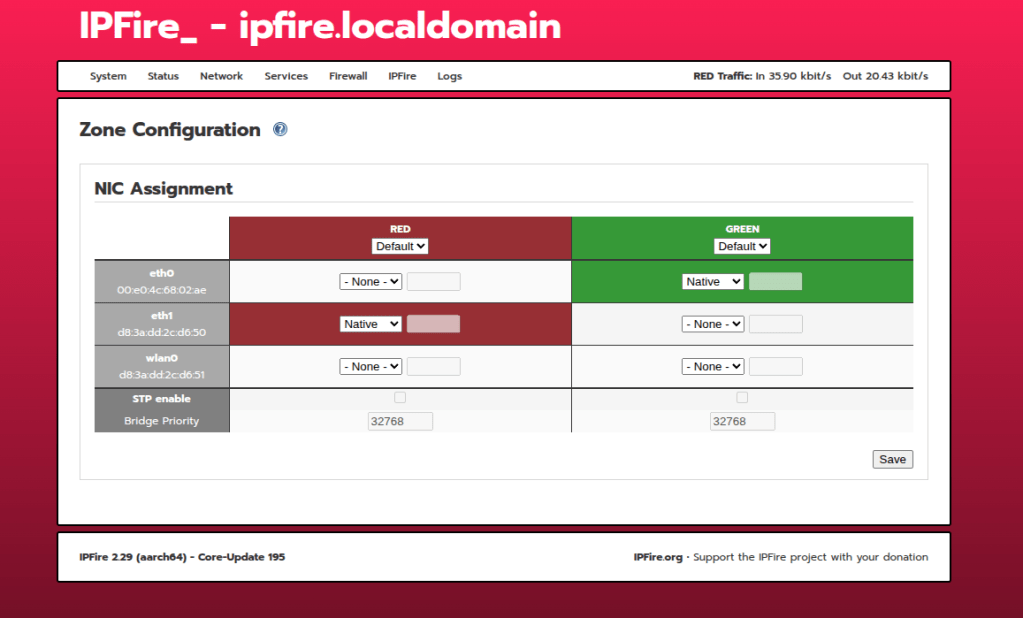
Because we want to go inline with this firewall, you will need to configure two networks using the red and green interface.
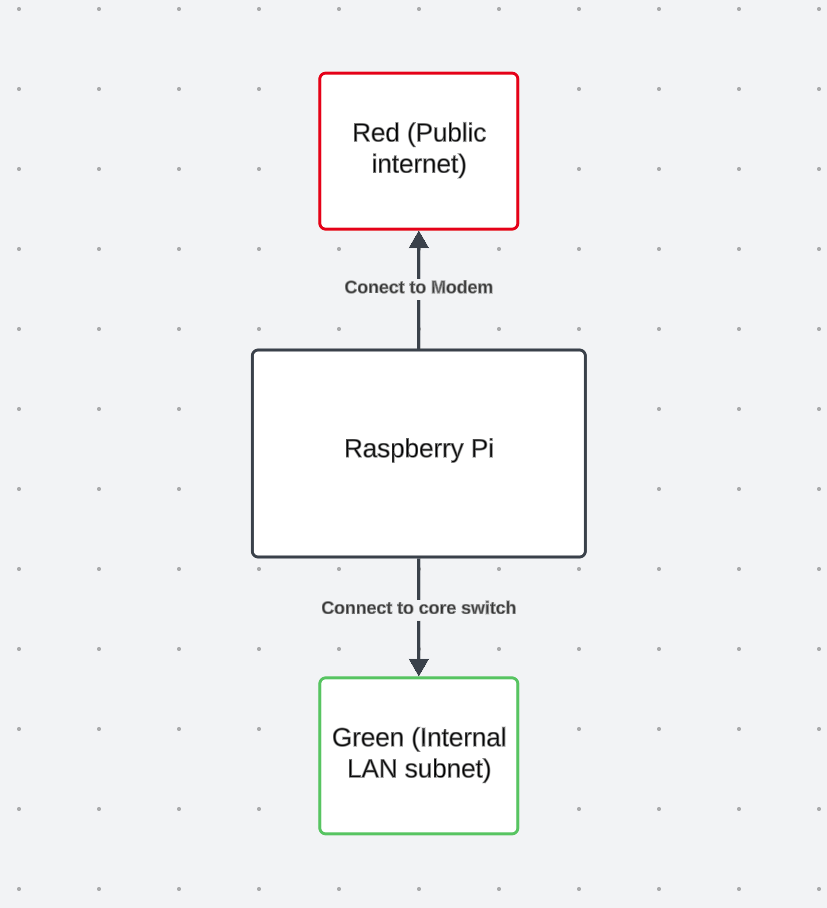
We are going to use the main Ethernet port on the Pi to connect the modem (red), and the USB-To-Ethernet cable to connect to the switch (green)
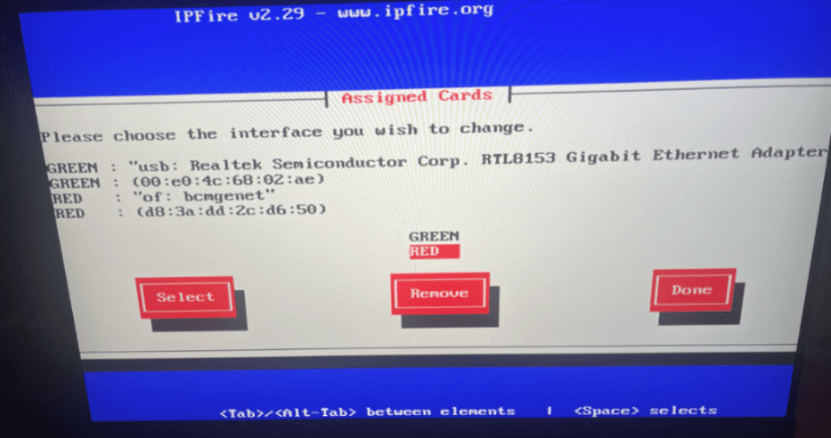
You can enter into each setting and apply the correct configuration for your network
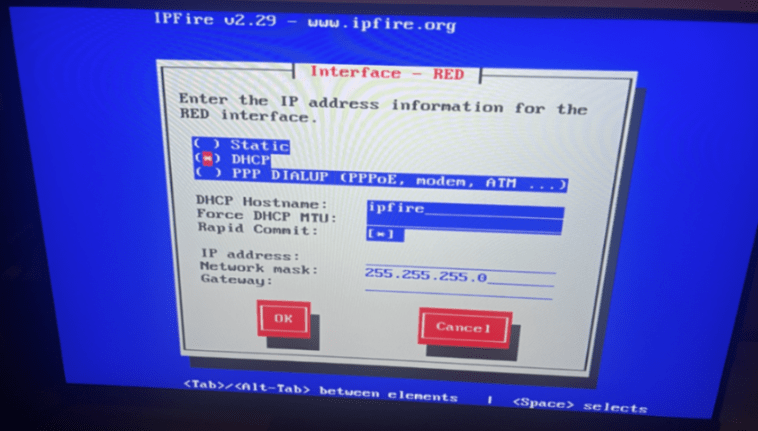
Next configure the red interface settings (use DHCP if your ISP provides a public IP for you and you do not pay for a static one)
Once you are done with the boot settings, plug in the Ethernet cables to your pi
Once you see lights blinking, you should be able to go to the web interface of IPfire using the green IP address on port 444
IPFire configuration Pt.2
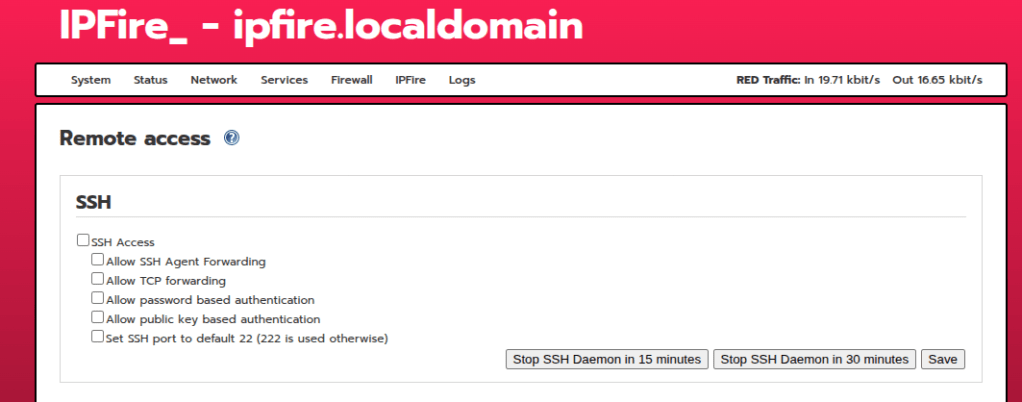
First things first, I have disabled SSH access on the machine for now as I have no use for the service
Within Network settings, go to DHCP server and enable it so you can assign IP addresses to your devices connected to the LAN
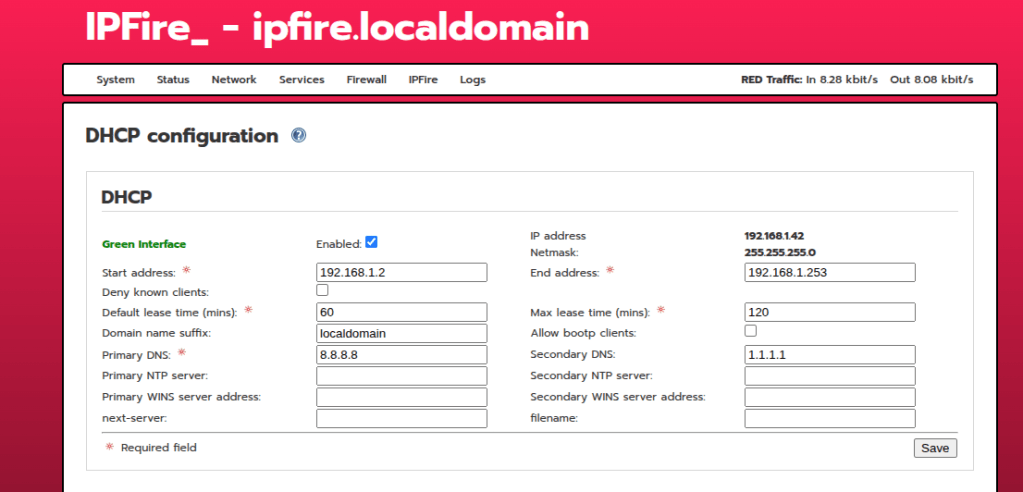
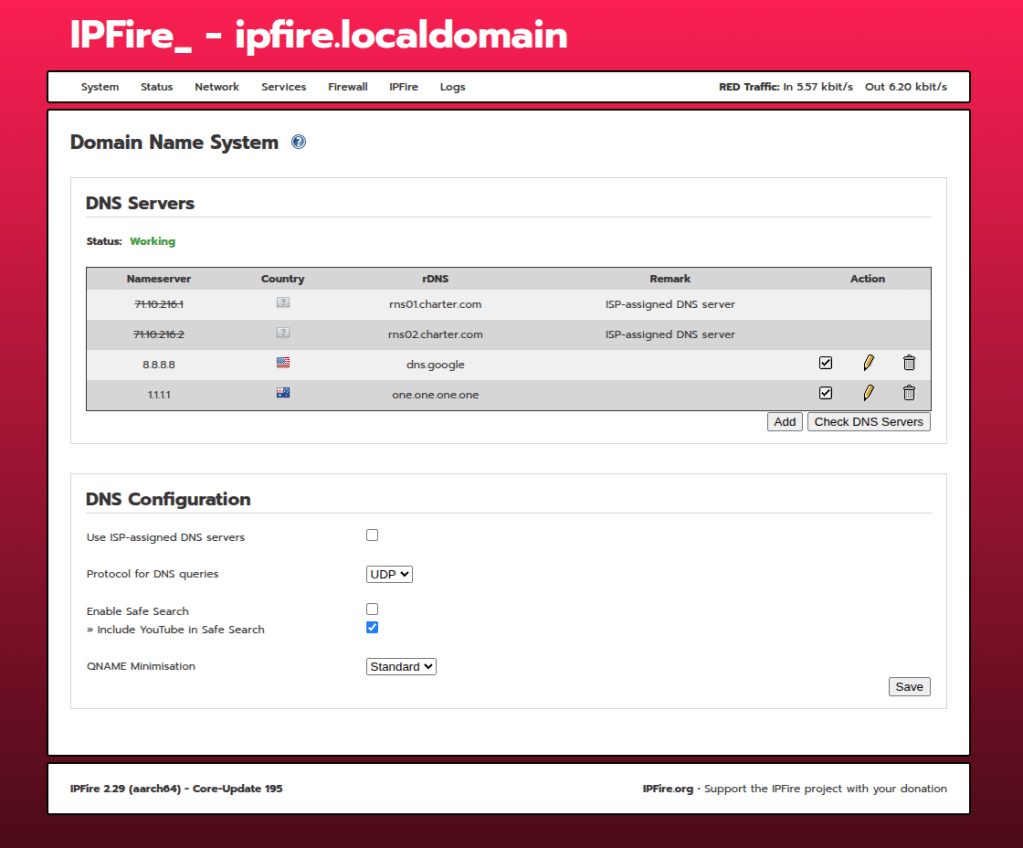
Because this is now going to be the default gateway and act as a DHCP server for your devices, you are going to want to make sure you are pointing IPfire to a couple of known DNS servers like 8.8.8.8 or 1.1.1.1
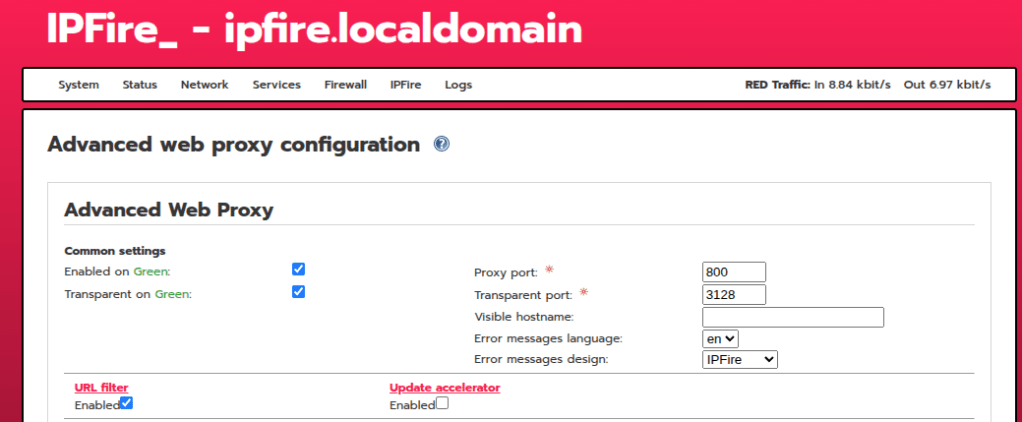
I originally have been using Pi-Hole as my Ad-Blocker, but IPfire has a similar capability. I did not want redundancy here, so I opted to use IPfire’s web proxy and content filter instead. In order to use the content filter, you need to enable IPfire’s web proxy for filtering. Navigate to Network > Web Proxy and enable it on your LAN
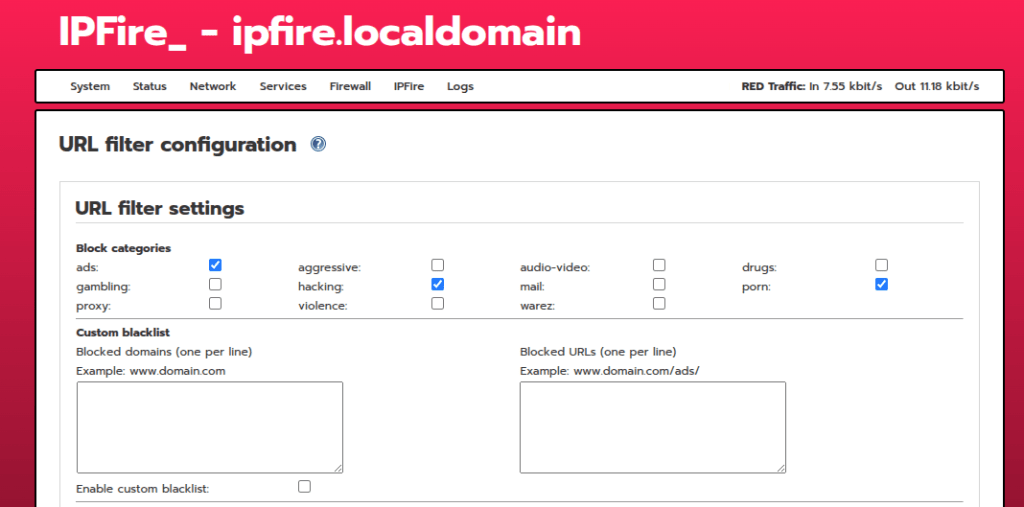
Next go to Network > Content filter and check the AD-block lists you would like to apply for your home network
From here we can apply a couple other cool security features under the firewall tab like:
- Firewall rules
- Intrusion Prevention System
- IP Blocklists
- Location blocking
The process is relatively straight forward, and just needs a checkbox to enable.
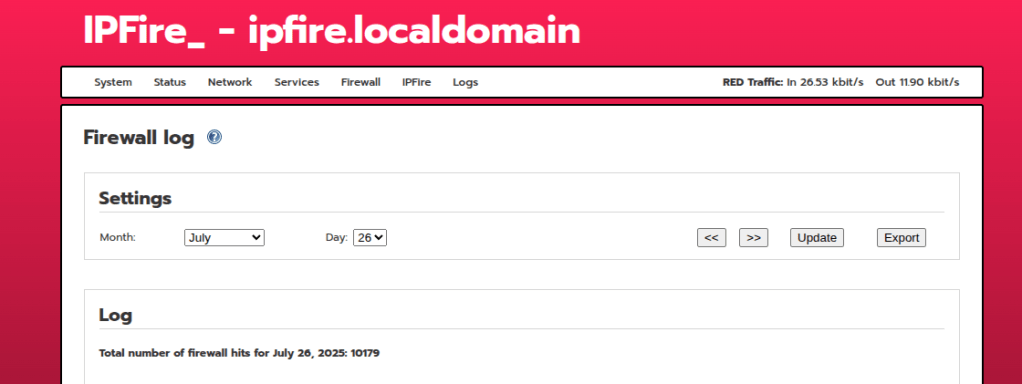
If you want to see all the firewall blocked packets, you can navigate to Logs > Firewall Logs, this will display all the scanning activity from the internet, which at first site was wild to see
Using the logs column you can view alerts from the ip blocklists, IPS, and firewall rules
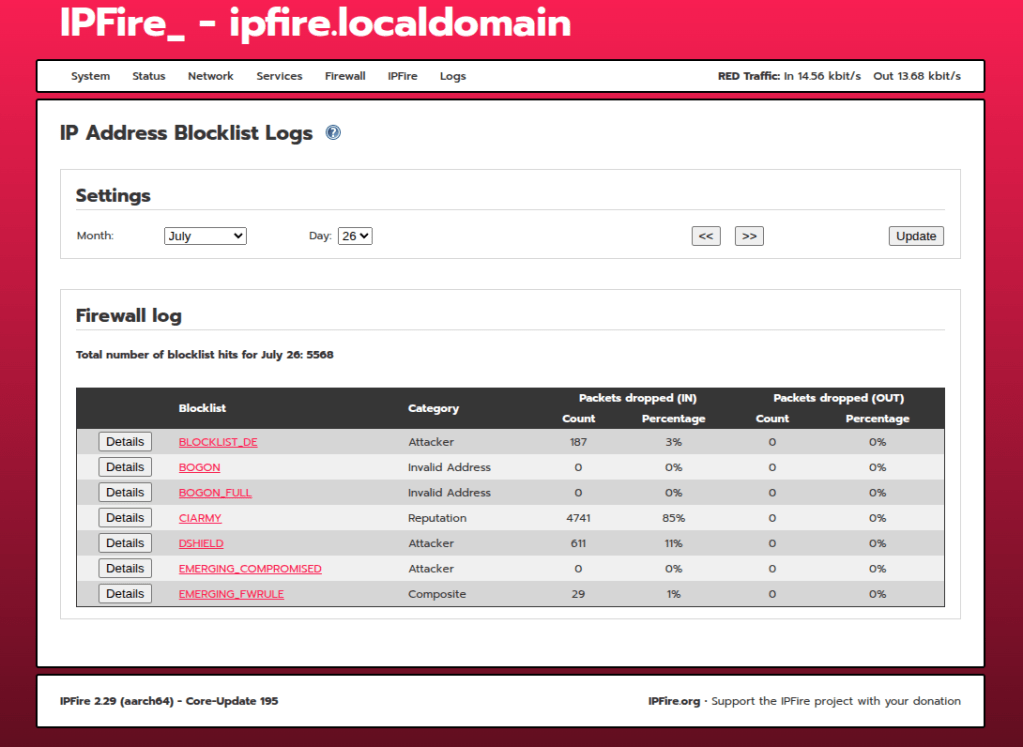
I also like to view the IP Address Blocklist Logs as well to seem some cool statistics
At last, you now have a free, open source firewall running on a raspberry pi! How cool is that!!!
